Using Subversion with VS Code
A VS Code extension can be used to submit assignments to your Subversion repository. This extension uses a Subversion client. To use the extension, you need to install both the Subversion client and the extension proper.
Installing a Subversion Client
Windows
- Download the installer for TortoiseSVN
- Run the installer. Be sure to install the command line client tools on the Custom Setup page.
MacOS
- install homebrew via https://brew.sh
- install svn with the command brew install svn
Installing the Extension
- Navigate to the extensions marketplace
- Search for "subversion"
- Install the extension authored by Chris Johnston

Using the Extension
Checking out a Project Directory
-
Press ctrl+shift+p, type "SVN: Checkout", and press enter

-
When prompted for a repository URL, paste the url specified on the
lab page for your class.
Be sure to include your Flashline username.
- Select a location to save the respository
- Enter a name for the folder the repository is to be stored in and press enter
- When prompted for a "repository username", enter your Flashline username
- When prompted for a "repository password", enter your Flashline password
-
The repository will be cloned to the folder specified and you will be given
the option to open it.

You can open the folder to begin working on labs. At any point in time, opening
this folder in VS Code will allow you to use the Subversion extension.
Committing files to Subversion
After checking out a respository, you are ready to work on assignments. A good practice
is to isolate each assignment into it's own folder within the repository. A folder can
be created for each lab containing all of the source code for that assignment. Once the
assignment is complete, this folder and its contents can be added to the repository.
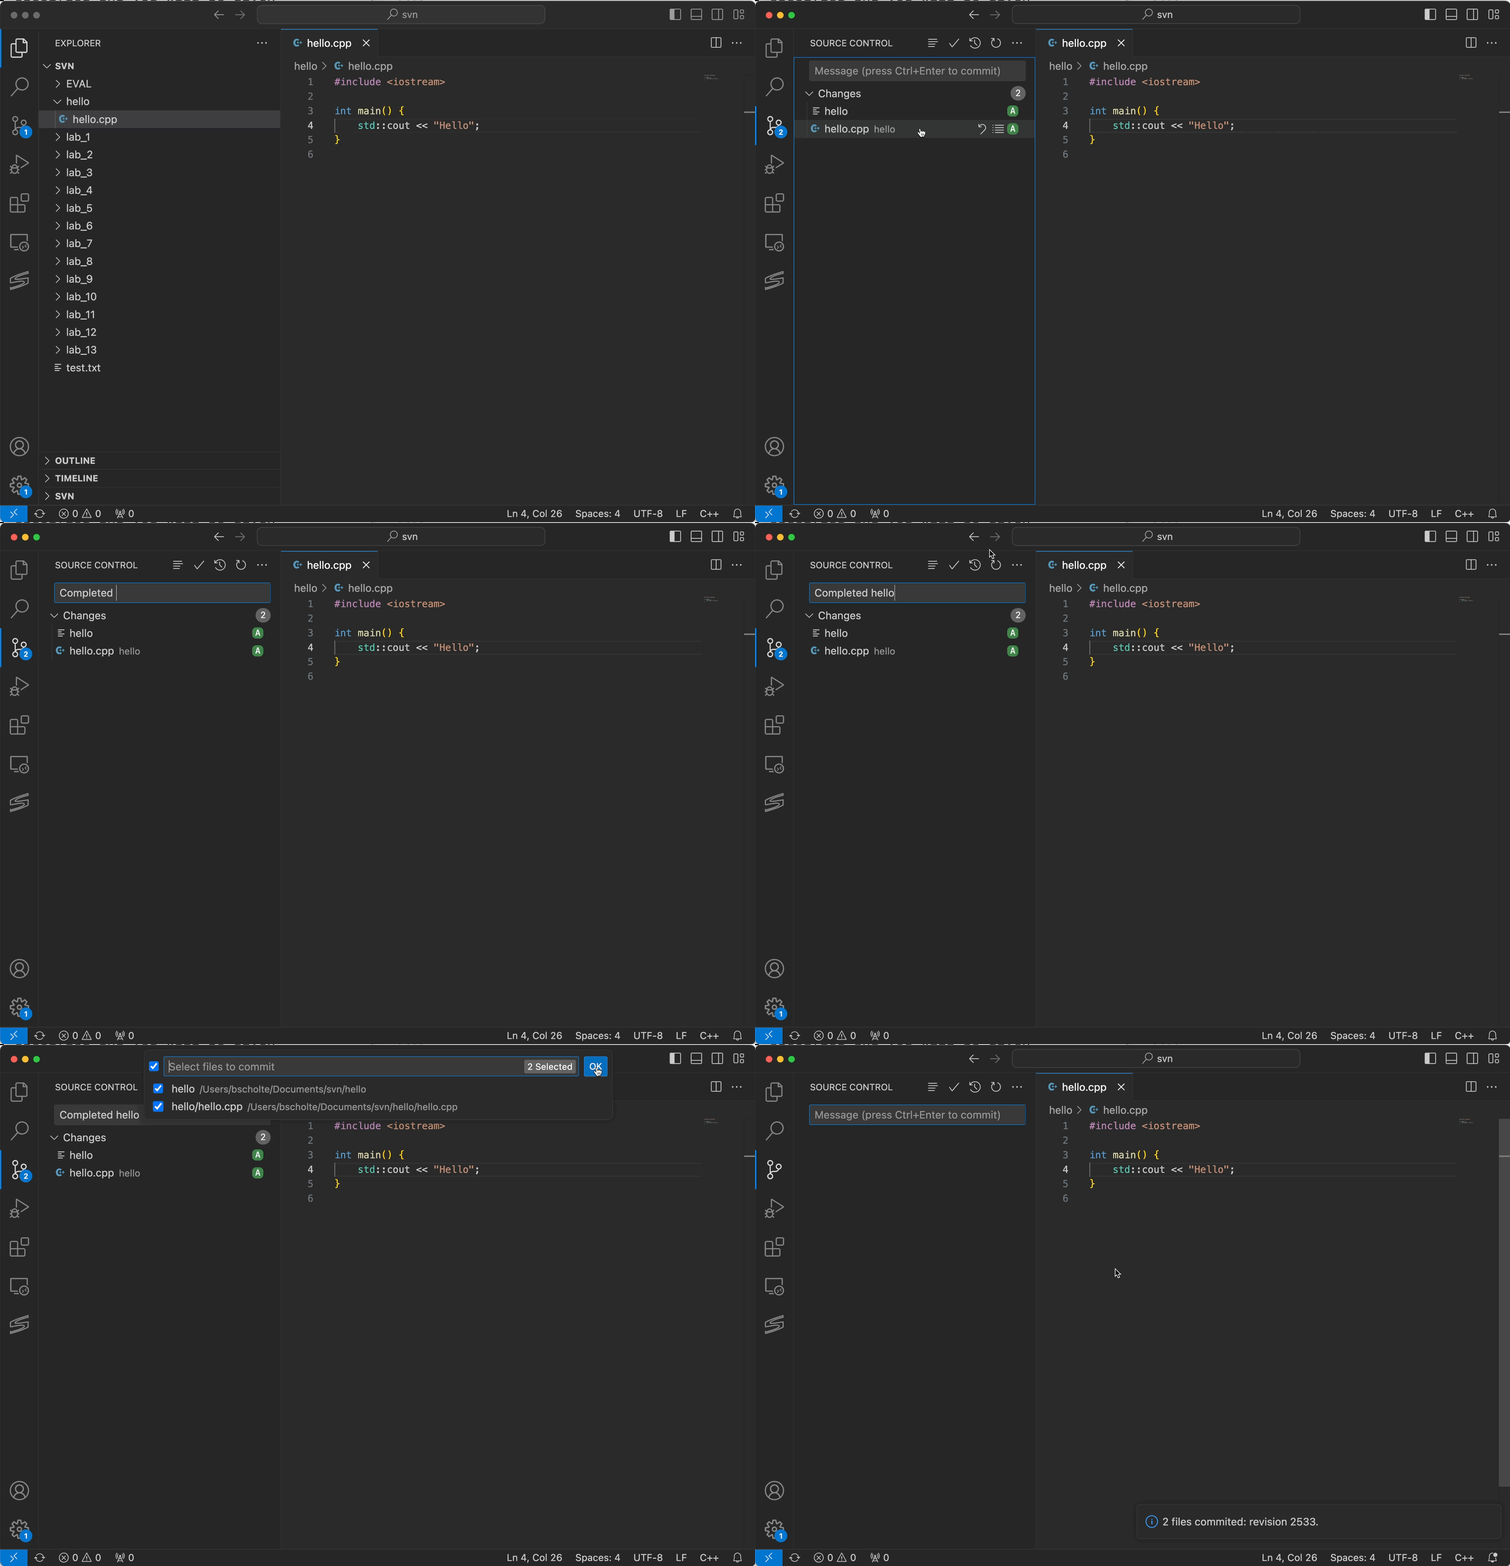
To add files and folders to a Subversion repository:
- Click the source control button along the right side of the window
-
Click the plus button next to any unversioned files and folders that
you would like to add to the repository
- Type a commit message in the text box above the "Changes" section
-
Click the checkmark to commit the changes (by committing you are
uploading the files to your repository)
-
Check that your files have been uploaded successfully by visiting the same URL
used to checkout the repository.

Updating the Local Copy
If you work on projects on multiple computers it is likely that at some point your local
copy will become out of date with the most recent commit to Subversion. To update your
local copy, you can click the "Update Revision" button in the status bar at the bottom
left of the screen.


